VS Code and WSL
Launching VS Code from the Terminal
-
You can launch VS Code directly from a WSL-ROS terminal instance. Simply type
code .and then hit Enter :
-
A warning message may then pop up:

Check the box to "Permanently allow host 'wsl$'" and then click the "Allow" button.
-
VS Code should then launch, and you'll be presented with another trust dialogue:

Click the blue "Yes, I trust the authors" button.
Installing the WSL Extension
-
The first time you launch VS Code (as above) you should be presented with a pop-up in the bottom-right of the screen, asking if you would like to "install the recommended 'WSL' extension from Microsoft..."

Click on the blue "Install" button.
Don't see the pop-up?
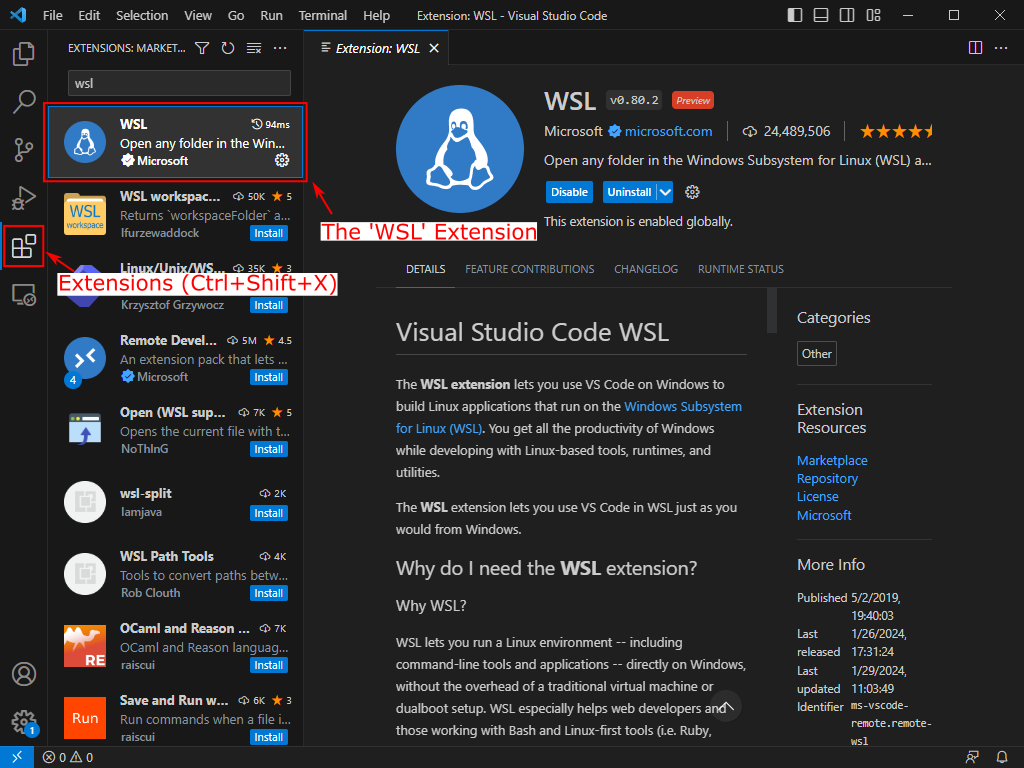
You can also install the 'WSL' extension manually.
Click on the "Extensions" icon in the left-hand toolbar (or hit Ctrl+Shift+X ), type "wsl" in the search box and hit the install button on the right extension, as show below:
-
Once installed, close down VS Code, go back to the WSL-ROS terminal instance and re-launch it using the
code .command again.This time, you may be presented with yet another trust pop-up dialogue:

Once again, check the box to "Trust the authors" and then click the blue "Yes, I trust the authors" button.
-
You can now navigate the WSL-ROS filesystem in the explorer window on the left-hand side of the VS Code screen. You'll need to use this to locate the packages and scripts that you create throughout this course!
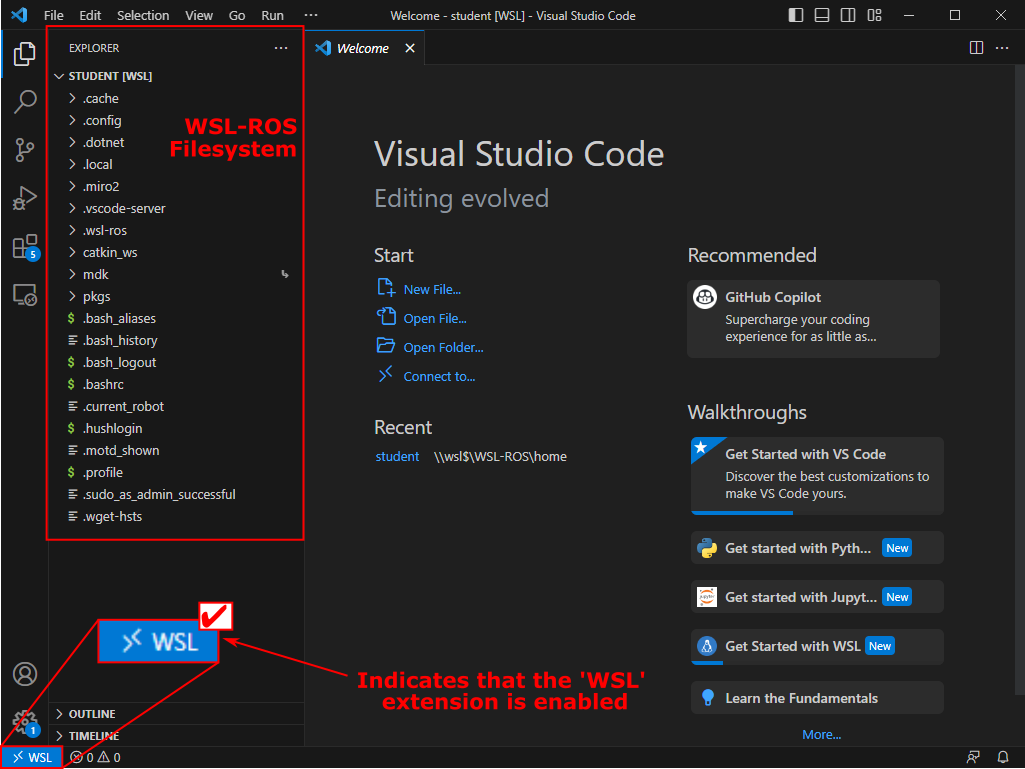
Important
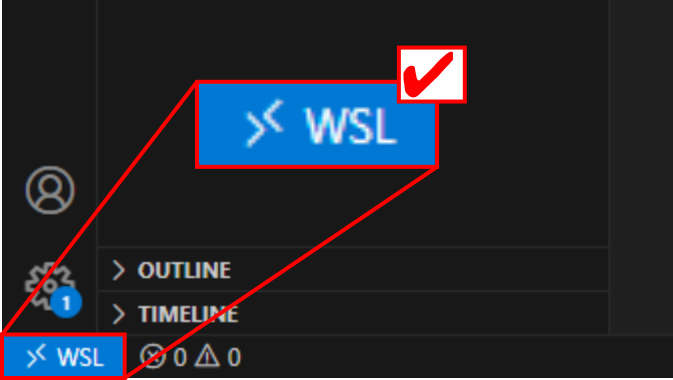
Always make sure that the "WSL" extension is enabled!!
If you don't see the WSL icon at the bottom-left of your screen (as shown below) then start again from the top or follow the alternative instructions below.
Accessing WSL-ROS from VS Code (Alternate Method)
It's really important to make sure VS Code is launched within the WSL-ROS environment each time you work with it. Having followed the steps above, if the blue WSL icon is visible in the bottom-left corner of the VS Code screen then you're all good. If not, then try this method to load it correctly instead.
-
First, make sure WSL-ROS is running by following the steps outlined here.
-
Launch VS Code from the Windows Application Menu by clicking the Windows Start Menu button:

-
Type
vscode(or justcodeworks as well) and click on the application shortcut that should then appear in the list: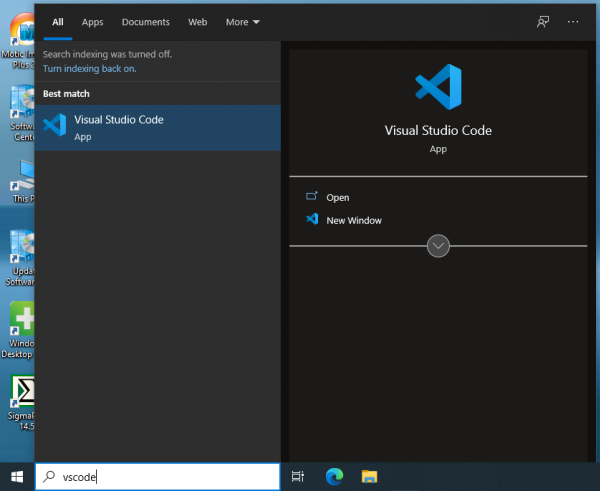
-
You should have already installed the "WSL" extension. If so, click the blue "remote window" icon and then click the
Connect to WSL using Distro...option in the menu that appears:
-
Then, click on
WSL-ROSto select it.
-
The blue "remote window" icon in the bottom left-hand corner should change now to indicate that VS Code is now running inside WSL-ROS:

-
Next, access the WSL-ROS filesystem by:
- Clicking the "Explorer" icon in the left-hand toolbar (or by using the Ctrl+Shift+E keyboard shortcut),
- Clicking the blue
"Open Folder"button, - Clicking
"OK"to select the default/home/student/filesystem location.

-
Finally, you should be presented with a pop-up asking if you trust the WSL-ROS home directory. Tick the checkbox and click on the blue
"Yes, I trust the authors"button: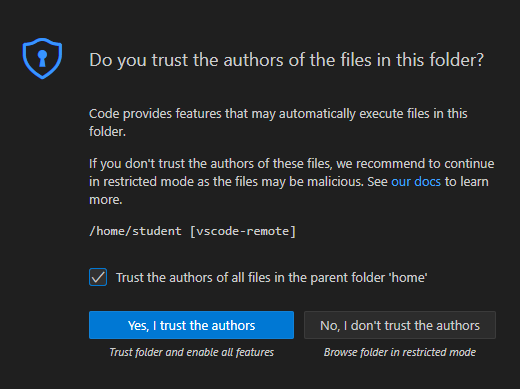
-
VS Code should now be good to go...

Always make sure that the "WSL" extension is enabled!!
Check that your blue "Remote Window" icon in the bottom-left of the VS Code screen always looks like this:

If not, then go back to the top of this page and try again!